Showing posts with label Handmade Gifts. Show all posts

Sunday, December 1, 2013

DIY Felt Town Car Play Set


I’m back for a special pre-Christmas post! Last year I wanted to make something special for a little guy in my life. This guy was 3 years old and loved to play with his cars more than anything. I decided to look online to see what I could find in the way of roll-up felt play sets for cars. I found several cute ideas, but this little guy is super creative and imaginative, so I knew I wanted something that would help him expand his creativity.


For this mat, I simply got a large piece of green felt and edged it with some binding (is that what it’s called? I don’t know).

Incidentally, I do not sew. I did make a little bit of an exception for this project, however, just because I wanted it to have a more polished, finished look.

Anyway, I did my mat and then I started having some fun with my scissors and began cutting out all the pieces to go with it.


I did not attach any of these to the mat, and I left the roofs and signs separate from the buildings (except for one). That way the little guy could mix and match and make his town however he wanted it to be. These are the pieces I made:

- 7 buildings- just used felt, black Sharpie, and fabric paint for these

- 7 roofs- detailed with black Sharpie

- 10 signs- black Sharpie on white felt

- several road pieces, including some intersections, long straight pieces, short straight pieces, curved pieces, 3 parking lots, and a bridge- the lines were all created using white puff fabric paint (and a ruler).

- several bushes & trees

- a garden- made from brown felt with green “veggies” sewn on with a simple ‘x’ in the center of each.

- a pond and some river pieces made from blue felt


Then I made a little carrying sleeve for all the parts, including a “parking garage” for the little guy’s cars. The top folds down over the openings so nothing falls out.


I made the set so that it was its own carrying case- you just lay the “accessories sleeve” across the open mat...


...fold the mat into thirds over top of it...


....fold each end into the center so they meet...


...then fold it in half again (so the crease is on the place where the two ends meet in the middle...


...and fasten with the attached tab (also handle) and wooden button. Now it’s its own little case that’s about the size of a laptop computer. 


When I was setting this up to take the photos I had so much fun building my little town. I decided that the library should be a tall, happy-looking building, the hospital a nice gray two-story, the museum was a tiny brown building with a red door...I put the garden behind the barn and the lake behind that, with a little stone cottage by the creek. The felt makes it so everything sticks and the cars can drive smoothly on the roads. Honestly, I probably had more fun than I should have. 

Ahem.

Anyway, this is a project that certainly takes some time and effort, but it is fun to make and even more fun to play with! You can also include some extra felt scraps in with your gift to allow the recipient to create his own unique touches for his town.

Things are busy around here with 4 kiddos, but I’ll try to get back and post every now and then! Have a beautiful and thrifty Christmas, friends!

Click here for more great DIY Christmas gift ideas!

Thursday, June 14, 2012

I'm here! Just pregnant!


Nope, haven't dropped off the face of the earth! But I am 5 weeks from delivery and recovering from a nasty sinus infection so...things have been interesting. But I did want to share this little project with you!

Tomorrow is the last day of school for us here, so I was working on some end-of-year gifts for teachers.  My son's teacher has had a particularly difficult year with her class (she had 27 kids and about 9 of them were troublemakers- my son not included!) so I thought this would be an appropriate sentiment for her.


I pretty much just copied the "Keep Calm" posters I'd seen out there and found a similar font, then worked with it on my computer until I liked how it looked. I just used free clipart for the book image, and then I printed it out on plain paper to see how it looked and make sure it would fit correctly on my dictionary page.

Then I took my dictionary page- the one with the definition for "teacher" on it- from an old dictionary and I centered it over the printout on the plain sheet of paper. (I held the dictionary sheet up to the light so I could see the wording on the plain sheet behind it and get it lined up correctly.) Next, I used scotch tape to secure it- I used just a thin edge of the tape on the edge of the dictionary page, leaving most of the tape attached to the plain printer paper. That way it would feed through the printer without getting jammed and, if the tape was difficult to remove from the dictionary page I could just trim off that little edge with my paper trimmer. A word of caution: make sure you know which way text will print on your paper before feeding it into your printer- you don't want to end up wrecking your chosen dictionary page with upside-down text!! I will sometimes draw a little arrow for myself on my test sheet to remind me which way I put it in. :-)

Once my words were printed on my dictionary page, I mounted it with glue dots onto a piece of patterned scrapbook paper (like a mat) and put it into my thrift store frame. The whole project cost less than a dollar and turned out quite nicely!

Did you do any crafty/thrifty projects for your kids' teachers this year? Leave a comment and share! (I always need new ideas for next year!)

Tuesday, August 30, 2011

More T-Shirt Fun: T-Shirt YARN!

Hope everyone made it through the storm okay- we were very blessed that our home was fine and we were all safe and sound. :-)


Check out this old t-shirt! Now, you know how much I get scissor-happy around old t-shirts. And this one was an XXL, so I decided it needed a LOT of cutting! It was the perfect candidate to create t-shirt yarn! I found the tutorial by Polka Dot Pineapple at one of my very favorite sites, So You Think You're Crafty. It's genius, really- since jersey knit t-shirt material doesn't fray, you can get an old t-shirt without side seams and create one looooong piece of material from it.


It took a long time to cut that baby up, but you should have seen the look on my face when I wound my masterpiece into an orb the size of a softball. I was positively giddy.

Now I'm using it to knit this scarf...or neck warmer? (might not be long enough for a scarf, we'll have to see)

I'm planning on getting more side-seam-less t-shirts and making more yarn so I can try out this great No-Knit Scarf from Martha Stewart. Fun stuff! I will be sure to share my results!

Sunday, June 5, 2011

New Arrivals!

Okay guys, promise not every post will be about the new etsy shop, but I'm just so darn excited. Here's a peek at what I worked on today. All- except one- are available in my shop!


Me modeling one of my favorites from today!


Getting moody and romantic with a dark plum and rhinestone combo...


Sweet lavender daisy!


And...(drumroll please)...my first sale! This lovely chocolate brown fleur will be shipped off to its new home tomorrow! :-)

I realized today that I can really get creative with these flowers. At first I assumed I'd just pop the flower off the stem and stick it to a hair clip, but the flowers are actually made with multiple layers of petals, and if you mix and match different petals you can create some pretty cool new flowers! Check out my shop for some examples.

I have another exciting project that I'm working on for the shop and I'll give you a hint: it's not a flower hair clip! It is special and unique and time-consuming, though, so I'll post about it later this week.

Have a beautiful and creative week, everyone!


Linking up to...
Keeping It Simple

Friday, May 6, 2011

Good Clean Fun


I was inspired by yet another fabulous idea from Martha Stewart when I saw her make these Fruit & Herb Soaps. She has a fabulous video tutorial on her blog (and step-by-step instructions) so I won't go into a ton of detail here, but I'll give you a basic idea of how it's done! I thought these would be a perfect gift for Mothers Day for my many moms (3!) and alllll of my many sisters-in-law (10!).


I started out with a giganto tub of glycerine soap, which I purchased at Michael's using one of my 40% off coupons. So it was only $24 instead of $40. I popped the whole block out of the tub and started chopping it up. I found that the easiest way to do this was to use a loooong knife and hold the handle in one hand, and then cover the end of the blade with a pot holder, so as not to stab myself, and then just gently rock the blade back and forth until it made it all the way through. I then cut it into cubes for easy melting.

As per Martha's instructions, I used a heat-resistant glass measuring cup to melt my glycerine in the microwave in 30-second intervals, stirring in between.

Meanwhile, I gathered my fruits and herbs:


Some fresh lavender from my very own garden (feeling very Martha Stewart-y about that).


An orange and a lemon and my Ultimate Chopper. It is SO ULTIMATE! And it needs to be cleaned on the outside. Yick.

I peeled the orange and lemon and tossed the peels into the chopper, pulverizing them into teeny little bits. Then I added them to my melted glycerine.


I stirred it around for a little while, letting it cool some before pouring it into the greased molds so that the citrus bits would be evenly distributed.


I used applesauce cups as my soap molds.


Then I did the same thing with my lavender, only I had to add water to get the leaves to chop up correctly. Then I just placed a paper towel over a cup and poured the lavender-water out onto it, using the paper towel as a filter. I carefully removed the paper towel, squeezed out the excess water, and left it out to dry some so that the lavender wouldn't stick to it too much. I was then able to sprinkle it into the glycerine. Here I'm using yogurt cups as molds. I also decided to do some strawberry soaps at the last minute.

I let the soap sit in the molds for about 20 minutes before sending them to the freezer (freezing helps release them from the molds).


After 2 hours in the freezer I popped them out and they looked great! One warning though- allow the soap to sit out at room temperature before you try packaging it. Because they've been frozen, they'll develop a layer of condensation. The moisture along with the thin layer of oil (I used olive oil to grease my containers) gives the soaps a slippery coating. Once they were at room temperature (and all done sweating) I just wiped them off with a paper towel and they were fine.


I thought the soaps were so pretty, I didn't really want to hide them with wrapping paper so I wrapped them in cellophane instead. I took a jar that was about the same size around as my soaps and wrapped the cellophane around it, taping it at the seams, then slid the jar out so that I was left with a bag that was just the right size for my soaps. I added the soap and tied it up with a ribbon and tag, and I think they turned out nicely! I love how colorful they are without any food coloring or dyes.

Happy Mothers Day, ladies!!

This week I am linking up to...

Keeping It Simple

Sunday, April 24, 2011

DIY Edible Arrangement

My 2010 Edible Arrangements knockoff for Easter

This particular project started in my usual way: Last Easter I was trying to find something nice to take to the annual Easter gathering at my in-laws' house and I thought, Ooh, those Edible Arrangements sure are nice. Wonder how much they run? So I checked it out, saw the price tag (start at around $40 for a small arrangement- like, big enough for 2-4 people), nearly had a heart attack, and got my thrifty thinking gears going. And of course, those thrifty thinking gears churned me into some classic knockoff action! I scoured the internet and found several sites with tips on how to do my own. So I messed around and got a fairly good Edible Arrangements knockoff out of it!

One warning: This takes time!! It takes time to cut up the fruit, and time to arrange it as well. All in all, plan on about 2 hours of hard labor for one of these babies!

Now I'll share what I've learned with you!


1. Choose your container. Make sure it's sturdy and deep enough that you can weigh it down in the bottom, otherwise your arrangement will be seriously top-heavy. Not good. Here I've used a #10 can (like a coffee can- I liked the simple rustic look of it) and weighed it down with some canned food and stuffed newspaper around them so they don't roll around.


2. Get some floral foam. NOT THIS FLORAL FOAM!!! I discovered after I began that this stuff is waaaaay harder to get skewers into than the real floral foam (that stuff that you can push in with your finger that also holds water). Cut the foam to fit your container- it's okay if it sticks up or is even down below the top of your container- just make sure you have enough foam to put lots of skewers into.

3. Arrange green leaf lettuce or parsley to cover your foam. The skewers you'll stick in will keep this in place.

4. Cut and skewer your fruit!
- cantaloupe & honeydew melon- these will be your "leaves" in your arrangement. Cut them into slices (they will have a half-moon shape) and then in half so each one looks kind of like a claw.
- red grapes- place on skewers 4-5 high, making sure not to poke through the top grape.
- strawberries- stick and you're done! Just don't poke all the way through!
- pineapple/melon "flowers"- cut pineapple into 1" thick slices and cut with a flower-shaped cookie cutter. Use a melon baller to create the centers. Poke skewer all the way through pineapple flower, then place ball on top (but don't poke all the way through it!).


5. Arrange- Use a photo as inspiration! Start at the bottom and work your way around and up. I discovered that in order to get the same look as the Edible Arrangements you have to start putting the skewers in nearly horizontally at the bottom and then gradually have them go up (like the spokes of a lady's fan- horizontal at the bottom then angling up to the top).

6. Fill in- use your lettuce or parsley and tear it into smaller pieces to fill in any areas where the skewers might show.


Here is my rushed masterpiece from this year! If I'd had more time (and had less stupid foam) I would have made it nicer, but at least it was colorful and fun! Total cost for fruit and materials was less than $20, and I had plenty of fruit left over to cut up into smaller pieces and mix together for a nice accompanying fruit salad. All in all, I'd say it's a successful knockoff, and great for Easter, Mother's Day, a birthday, or any kind of spring or summer gathering!

Linking to...

Keeping It Simple

The DIY Show Off
 http://linda-coastalcharm.blogspot.com/


Transformation Thursday

Friday, April 15, 2011

Pretty Felt Flower Clips!


Please excuse the not-so-great quality of the photos in this post. My DSLR is having issues so I had to resort to my point-and-shoot. I did the best I could, really I did!

I have REALLY got to start taking notes when I start surfing the blogosphere because I'm always finding new ideas to try, and when I find one I usually write it down on my "Crafts To Do" list, but I always forget to note where I found it! So, if you think this might be your craft that I copied and you see this post, PLEASE feel free to let me know!!

So anyway, I saw a tutorial on how to make these super cute felt flowers, and I couldn't wait to give it a try, especially because I have two little girls who happen to love wearing flowers in their hair (and their mom doesn't think it's so shabby either)!

Since I have no idea where I first saw this idea (seriously, if it's yours, TELL ME!) I went ahead and made my own tutorial for you. You will need:

- Felt ($0.25/sheet in the craft section at Wal-Mart)
- Undecorated hair clips ($5.00/box of 100 at Sally Beauty Supply store)
- Buttons, jewels, pearls, other doodads to decorate the center of your flower ($2 for 40 pearls at Michaels- remember from the bridal shower invitations? $3 for 120 acrylic rhinestone jewels at Wal-Mart)
- Hot glue gun & glue

I started out by deciding how big I wanted my finished flower to be. I went with a 2 1/2" diameter and freehand sketched a little flower on some felt with a pen. Then, I cut it out and used it as a template to draw 4 more flowers, being careful to cut inside the pen line so that I wouldn't have flowers with inked edges.


Next, I used my glue gun (why I felt this shot was necessary I do not know) to put some piping hot glue in the center of what will be my first petal.


See the glue? Yep, there it is. Right in the middle.


Then, after I had already burned my fingers about a dozen times doing the other 3 flowers, I finally got smart and used one of the hair clips to pinch the flower in half, holding it for a few seconds while the glue sets. What do they say? "Intelligence is learning from your own mistakes; true wisdom is learning from someone else's mistakes"-? Something like that. Anyway, you're welcome.


Now I have placed a dab of glue in the bottom center of my folded flower and...


...I am once again saving my fingers from a printless existence by using the hair clip to fold the flower into fourths.


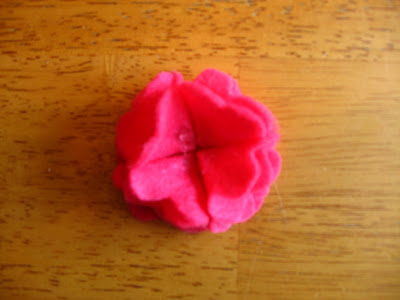
Repeat the same process with 4 of your 5 flowers- the 5th will stay unfolded as your base. Here you can see how I'm fitting the flowers on top like the world's simplest puzzle. Add glue to the base to secure your petals and you have...


A petal-y flower. But wait, it gets better...


A button! I added a button. But you can add whatever you like- the pearls, rhinestones, beads- anything your little heart desires.


Once my clip was done being my surrogate fingers, I prepped it to hold the flower. I just used a scrap of my felt and cut it into a pleasing shape (a football? a pair of lips? who knows?), then simply clipped it into the clip.


Then I added the oh-so-helpful hot glue.


And attached my flower! Now it's neat as a pin. Well, neat as a hair clip. Are hair clips neat? Mine is!


See, Little Boo definitely thinks so (don't worry, she's not putting anything dangerous into her mouth).


And I had barely finished with my rhinestone-studded flowers before another little princess practically grabbed them from my hands to put in her hair!


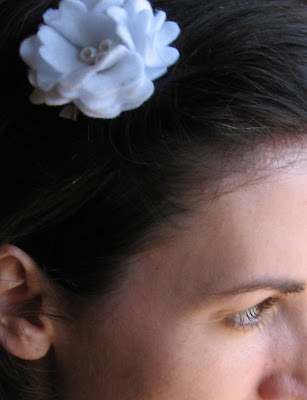
And I admit it- this one was just for me. :-)


I'm thinking, Wow, the grass in the backyard really needs cutting. I don't care. I have a pretty flower in my hair.


But hair isn't the only thing these little cuties are good for...


Look at how they dress up the ends of my Happy Easter banner!! (FYI, Starlet snatched her flower back down from the banner the second I finished taking these photos. She's slightly flower obsessed. I wonder where she gets that from? Hmm...)

Later, I took a photo of me wearing this flower yet another way- check the post below to see (I couldn't seem to add it in after I'd finished this post).

Total calculated cost for 1 flower clip: $0.14 (that's if you use the pearls). Cheap, easy, and beautiful. My kind of project!!

A few ideas:

- You could add a little green felt leaf
- You could make your petals pointy
- You could clip 1 or more flowers to a headband or scarf
- You could make these to match an easter dress (mine matches my easter dress!)

I think I'll go make a few dozen more. :-)

This week I'm linking up to:


Keeping It Simple


 http://linda-coastalcharm.blogspot.com/
Related Posts Plugin for WordPress, Blogger...