Showing posts with label Fashion. Show all posts

Thursday, October 13, 2011

Goodwill Gold

I have a dear sweet friend at church who is very fashionable and whenever she sees me, she says, "You always look SO cute, Kasey! Where did you get that??" And she always gets so exasperated because my answer, about 90% of the time, is "Goodwill outlet!"
Let me confess something to you: I used to be a shopping snob. I didn't do Goodwill- whenever I thought of shopping at Goodwill I thought of oversized stained t-shirts, women's suits from the 80's (complete with shoulder pads) and polyester. LOTS of polyester. To be honest, the thought of thrift store shopping repelled me.

Then we started having kids, and we were on a budget. We started checking out Goodwill just for random things we needed that we considered okay to buy used. Then I saw that they had some pretty cute kids clothes, and kids grow out of their clothes practically faster than you can buy them, so I relented. And then an occasion would come up where I would need something specific in a hurry that wasn't in our budget (like a black skirt or something) and so I would go there to see if I could find something just for this one time. Then I found myself putting lots of things in my cart to try on...and I became hooked.

So if any of you out there might feel a little wary of thrift store shopping like I did, I am here to dispel the myth of the Polyester Palace! Here are a few of my favorite Goodwill Outlet finds and some tips for making the most of your own thrift store shopping.

Fashion Show!!

I LOVE the cut of this satin top. So slimming! Incidentally, the skirt I'm wearing is also from the Goodwill outlet- knee-length black satin with wide pleats. I paired this with opaque black tights and a cute pair of satin Steve Madden pumps- also from Goodwill. ;-)


Super soft teal drape-front sweater (Banana Republic) and the perfect pair of black pants (okay, they may be polyester, but they have a great modern style!).


These. boots. are. AWESOME. Are they not? And really, for $2, how can you go wrong??


Love this sheer black drapey top with dolman sleeves. It has just the right amount of sparkle around the neckline to make it perfect for a night out.

Tips on thrift store clothing shopping:

1. Don't go with expectations. It's okay to be hoping to find something, but it's always best to go with an open mind so that the deals find you.

2. Go often. Stock changes constantly, so rather than doing one blowout trip, break it up and go frequently in order to spend less on items you really love.

3. Know your size and what shapes work best on you (not all places have dressing rooms) Shape and fit are FAR more important to me than color and/or pattern. The idea is for the garment to make YOU look good and for people to notice you, not what you're wearing. Also keep in mind that these clothes may have shrunk or stretched from their original size, so try to train your eye to be able to recognize your size.

4. Be familiar with brands. Name brands = quality and style. Once when checking out at a Goodwill store the cashier looked at the clothes I had picked out, including the Steve Madden shoes, a cashmere sweater and a DKNY shirt, and said, "Oh, girl- you knew what you were looking for!" Yes. Yes I did. :-)

5. When in doubt, check it out. You might not always be able to tell what something is at first glance (see last photo!)- things aren't styled like they are in retail stores, so pull it out away from the other clothes to see it alone and get a better perspective. That peach blouse might actually look pretty great once you get it away from that olive green sweater!

6. Don't get too excited over the price and buy things you won't use. You know what I'm talking about. You've done it. Admit it.

7. Look for staple items- they're always there! Basic black skirts & pants, basic button-up blouses, jeans, etc.

8. Evaluate wear & tear vs cost. If an item is damaged, can you- and WILL you- take the time and/or money to repair it? Be honest with yourself!

9. Step outside your box. Thrift shopping is a great opportunity to step outside of your comfort zone and try something new without risking too much cash! Try going bohemian or punk. What have you got to lose?

10. Saving $$ on clothes means you can spend extra on accessorizing! Even a very basic thrift store find can look fabulous when paired with the right accessories. Get some pretty new earrings to bring out the color in your new shirt.

Are you a thrift store fashionista? What was your best find??

Wednesday, September 21, 2011

The Splurge


Have you ever splurged on something and then thoroughly regretted it?

Have you ever splurged on something and then felt not one ounce of remorse?

Have you ever not splurged on something and then regretted it?

These are all common feelings surrounding a splurge (or lack thereof) and they all went through my head as potential outcomes last Saturday night.

The Setting: Girls Night Out with one of my best friends at a high-end shopping mall.

The Store: An adorable little boutique called, appropriately, "Two Friends." Think purses, jewelry, accessories, picture frames, and home decor. As girly as can be.

The Item: A pink/purple pashmina scarf/wrap. 70% genuine pashmina wool, 30% silk. So soft and silky you wouldn't believe it. A delicate, barely-there floral damask pattern woven into it, a slight sheen that allows you to see the faint outline of blossoms. Pretty much the prettiest thing ever made.

So here's the story. My friend and I have been walking around all night, going into stores and perusing the racks of sweaters and blouses that cost about 98% more than I usually spend (I'm a Goodwill outlet shopper, people). We've been fingering their fine fabrics and admiring their detailed workmanship and gasping at the outrageous price tags for over an hour now.

I have reached the point in my life where I'm not miserable doing this: I can accept the fact that my hard-earned money is better spent elsewhere. However, the diva inside me sure does appreciate fine things. And her little voice, every once in awhile, is whispering, Ohh, that would look good on you, and Oooh, this fabric is so soft. But I'm not buying. I'm just looking.

I had already decided that if I found something inexpensive, possibly useful and really nice (clearance racks, anyone?) then maybe- maybe- I could spend just a little. Less than $10 for sure.

So that was my state of mind when my friend and I entered the store. We walk around, appreciatively picking up and putting down various items, making our circuit around the store's perimeter. We're just approaching the opposite side of the front of the store where we had started when I see it: the Scarf. It had been carelessly tossed onto a display table next to its counterparts, all of which paled in comparison. I touch it and discover that yes, it really is as soft as it looks. I hold it draped over one hand and run my fingers down its length, as little cartoon hearts start shooting out of my eyes. The only tag on it reads, "Pashmina, 70% pashmina, 30% wool". No price tag. I sigh, fairly certain it is far out of my price range, and place it back onto the table, puddling it gracefully so that its beauty can be fully appreciated by other shoppers.

I move on to look at other items in the store, but my eyes keep returning to that amazing, lovely scarf. I am walking toward it one last time to bid it farewell when the saleslady calls from across the store, "The pashmina scarves are $22.95."

$22.95????

I have $22.95. Well, not in cash in my pocket, but in my bank account. And it's just at that threshold where it will still be at the eye-roll-and-sigh from-my-husband and not the angry-YOU-SPENT-HOW-MUCH?? from my husband. This I can live with. My mind starts racing, desperate for a good excuse for why I must buy this scarf.

Do I need a scarf? No. I have at least five scarves at home that work perfectly well.

Maybe I could give it as a gift. That idea gets thrown out quickly. I know that once it's in my hands I could never part with it.

Did I do something to earn this scarf? Well...my etsy shop is doing pretty good. After money spent on crafting materials I'd still have to sell a few more items to pay for this, though...

Is it a killer good deal? Well, it's not a bad deal, but killer good? Probably not. I could buy 5 shirts on clearance for what this scarf costs.

My brain goes through every possible scenario, leaving me with only one excuse. And it's not a good one. I just want it. Really bad. Because it's so pretty.

I know what I have to do. It feels strange, unnatural, so not me, and so good.

I buy it. Just because. I have no good reason, other than that I am in love with this scarf and I believe it loves me back. (Okay, I know scarves are inanimate objects and have no capacity for emotion, but this one is special. Really, really special. Trust me.)

As I carry it triumphantly to the register and hand over my card, my hand is shaking a little. I chat with my friend and the cashier about how much I love the scarf and they both agree that we were meant for each other. It makes my high even higher. The cashier carefully wraps my new purpley-pink pashmina prize in a lime green tissue paper and carefully places it into a bright purple bag (it all clashes terribly with my scarf, but I don't care). As I leave the store, my mind is already racing as I try to think of when I will be able to wear it for the first time.

My lovely scarf is now home with me. I took it home that night, showed it to my husband (promptly met with aforementioned eye-roll-and-sigh) and wrapped it around me as we sat on the couch watching tv. Then I took it upstairs and hung it on a hanger in my closet. It still hasn't been quite cold enough to wear it yet, but each morning when I get dressed I finger it lovingly and it just somehow makes me feel special.

So for me, this was a splurge that was definitely NOT a regret. Because sometimes a girl needs to stop pinching her pennies and for once let them make her feel beautiful and special (and purpley pink and soft and silky too).

THE END!

Tuesday, August 30, 2011

More T-Shirt Fun: T-Shirt YARN!

Hope everyone made it through the storm okay- we were very blessed that our home was fine and we were all safe and sound. :-)


Check out this old t-shirt! Now, you know how much I get scissor-happy around old t-shirts. And this one was an XXL, so I decided it needed a LOT of cutting! It was the perfect candidate to create t-shirt yarn! I found the tutorial by Polka Dot Pineapple at one of my very favorite sites, So You Think You're Crafty. It's genius, really- since jersey knit t-shirt material doesn't fray, you can get an old t-shirt without side seams and create one looooong piece of material from it.


It took a long time to cut that baby up, but you should have seen the look on my face when I wound my masterpiece into an orb the size of a softball. I was positively giddy.

Now I'm using it to knit this scarf...or neck warmer? (might not be long enough for a scarf, we'll have to see)

I'm planning on getting more side-seam-less t-shirts and making more yarn so I can try out this great No-Knit Scarf from Martha Stewart. Fun stuff! I will be sure to share my results!

Friday, June 24, 2011

Your Old T-Shirt's Worst Nightmare!!


This instant-gratification project was inspired by this No-Sew Summer Cardi/Wrap! (aren't you proud of me? I actually remembered to bookmark the link!) But if you know me, you'll know that I'm not going to go out to the store and buy the fabric when I can just recycle an old shirt from the Goodwill outlet!

Sadly, I was so excited to do this project that I have no before pictures. Just envision a blue long-sleeve v-neck t-shirt, then imagine me doing the following:

1. Lay it out flat on table, using sharp scissors cut off sleeves, including seam.

2. Line up side seams so that you find the exact middle of the front of the shirt (the point of the v-neck). Cut along fold.

3. Try it on, decide you like it better with no seams up at the top, then do a little more cutting to remove those and eliminate any corners.

4. Look at the sleeves and start cutting those into little loops, which you stretch and hang around your neck for a matching necklace.

5. Take a couple more loops and wrap 'em around your wrist just for kicks.

Voila! You have a cool rocker-chic outfit. Pair with a white t-shirt (don't let the white t-shirt watch the "operation" you just performed on its cousin- it might run away) and a pair of jeans and you've got a whole new look! Sweet!

Ahh, the joys of instant fashion gratification...


Linking up to:

mommaskindacrafty

Sunday, June 5, 2011

New Arrivals!

Okay guys, promise not every post will be about the new etsy shop, but I'm just so darn excited. Here's a peek at what I worked on today. All- except one- are available in my shop!


Me modeling one of my favorites from today!


Getting moody and romantic with a dark plum and rhinestone combo...


Sweet lavender daisy!


And...(drumroll please)...my first sale! This lovely chocolate brown fleur will be shipped off to its new home tomorrow! :-)

I realized today that I can really get creative with these flowers. At first I assumed I'd just pop the flower off the stem and stick it to a hair clip, but the flowers are actually made with multiple layers of petals, and if you mix and match different petals you can create some pretty cool new flowers! Check out my shop for some examples.

I have another exciting project that I'm working on for the shop and I'll give you a hint: it's not a flower hair clip! It is special and unique and time-consuming, though, so I'll post about it later this week.

Have a beautiful and creative week, everyone!


Linking up to...
Keeping It Simple

Friday, June 3, 2011

BIG ANNOUNCEMENT!!! Grand Opening of Kasey's Beautiful Life ETSY SHOP!!!!

It's been a dream for awhile, but this weekend it's becoming a REALITY!! I am announcing the grand opening of my etsy shop, "Kasey's Beautiful Life"! I decided that the desire to create was giving me something of a surplus and hey, why not make my crafting addiction pay off and spread a little beauty around the world while I'm at it?

Here are a few of the items you'll see appearing in my shop over the next few days...

White Lotus Flower Hair Clip

Dusty Rose Flower Hair Clip

Chocolate Brown Flower Hair Clip

Pink/White Wildflower Flower Hair Clip

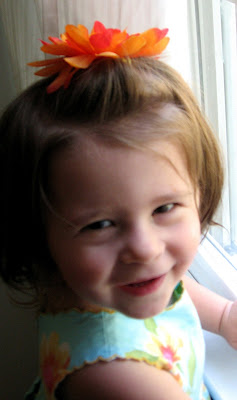
Sorry, this one's not for sale. But the flower on top of her head is. I did say I was trying to spread some beauty around the world, didn't I? ;-)

So if you have a chance this weekend, please stop by and look around! I'm super excited!!! (in case you couldn't tell!!)


Linking up to...

Friday, April 15, 2011

Pretty Felt Flower Clips!


Please excuse the not-so-great quality of the photos in this post. My DSLR is having issues so I had to resort to my point-and-shoot. I did the best I could, really I did!

I have REALLY got to start taking notes when I start surfing the blogosphere because I'm always finding new ideas to try, and when I find one I usually write it down on my "Crafts To Do" list, but I always forget to note where I found it! So, if you think this might be your craft that I copied and you see this post, PLEASE feel free to let me know!!

So anyway, I saw a tutorial on how to make these super cute felt flowers, and I couldn't wait to give it a try, especially because I have two little girls who happen to love wearing flowers in their hair (and their mom doesn't think it's so shabby either)!

Since I have no idea where I first saw this idea (seriously, if it's yours, TELL ME!) I went ahead and made my own tutorial for you. You will need:

- Felt ($0.25/sheet in the craft section at Wal-Mart)
- Undecorated hair clips ($5.00/box of 100 at Sally Beauty Supply store)
- Buttons, jewels, pearls, other doodads to decorate the center of your flower ($2 for 40 pearls at Michaels- remember from the bridal shower invitations? $3 for 120 acrylic rhinestone jewels at Wal-Mart)
- Hot glue gun & glue

I started out by deciding how big I wanted my finished flower to be. I went with a 2 1/2" diameter and freehand sketched a little flower on some felt with a pen. Then, I cut it out and used it as a template to draw 4 more flowers, being careful to cut inside the pen line so that I wouldn't have flowers with inked edges.


Next, I used my glue gun (why I felt this shot was necessary I do not know) to put some piping hot glue in the center of what will be my first petal.


See the glue? Yep, there it is. Right in the middle.


Then, after I had already burned my fingers about a dozen times doing the other 3 flowers, I finally got smart and used one of the hair clips to pinch the flower in half, holding it for a few seconds while the glue sets. What do they say? "Intelligence is learning from your own mistakes; true wisdom is learning from someone else's mistakes"-? Something like that. Anyway, you're welcome.


Now I have placed a dab of glue in the bottom center of my folded flower and...


...I am once again saving my fingers from a printless existence by using the hair clip to fold the flower into fourths.


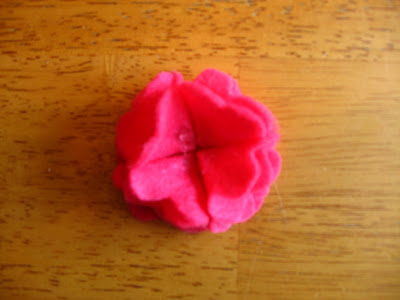
Repeat the same process with 4 of your 5 flowers- the 5th will stay unfolded as your base. Here you can see how I'm fitting the flowers on top like the world's simplest puzzle. Add glue to the base to secure your petals and you have...


A petal-y flower. But wait, it gets better...


A button! I added a button. But you can add whatever you like- the pearls, rhinestones, beads- anything your little heart desires.


Once my clip was done being my surrogate fingers, I prepped it to hold the flower. I just used a scrap of my felt and cut it into a pleasing shape (a football? a pair of lips? who knows?), then simply clipped it into the clip.


Then I added the oh-so-helpful hot glue.


And attached my flower! Now it's neat as a pin. Well, neat as a hair clip. Are hair clips neat? Mine is!


See, Little Boo definitely thinks so (don't worry, she's not putting anything dangerous into her mouth).


And I had barely finished with my rhinestone-studded flowers before another little princess practically grabbed them from my hands to put in her hair!


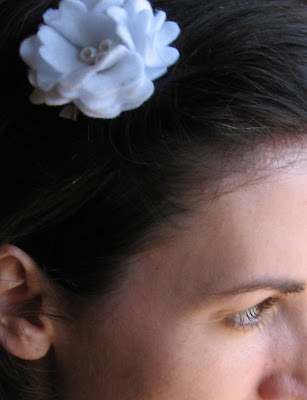
And I admit it- this one was just for me. :-)


I'm thinking, Wow, the grass in the backyard really needs cutting. I don't care. I have a pretty flower in my hair.


But hair isn't the only thing these little cuties are good for...


Look at how they dress up the ends of my Happy Easter banner!! (FYI, Starlet snatched her flower back down from the banner the second I finished taking these photos. She's slightly flower obsessed. I wonder where she gets that from? Hmm...)

Later, I took a photo of me wearing this flower yet another way- check the post below to see (I couldn't seem to add it in after I'd finished this post).

Total calculated cost for 1 flower clip: $0.14 (that's if you use the pearls). Cheap, easy, and beautiful. My kind of project!!

A few ideas:

- You could add a little green felt leaf
- You could make your petals pointy
- You could clip 1 or more flowers to a headband or scarf
- You could make these to match an easter dress (mine matches my easter dress!)

I think I'll go make a few dozen more. :-)

This week I'm linking up to:


Keeping It Simple


 http://linda-coastalcharm.blogspot.com/

Sunday, March 27, 2011

Recycled Magazine Paper Bracelet


Lately I have been spending waaaay too much time browsing jewelry on etsy. I love the fun look of all the "upcycled" fashion accessories, so when I saw this idea for recycled magazine paper beads in the Family Fun magazine, I just had to try it!
Luckily, I had a few home decorating magazines sitting around which were chock full of gorgeous colors and textures, so with Starlet's help, I went through them choosing several colorful pages to use to create my beads.


Here is a page after I had cut it into fourths with my paper cutter. The great thing about this is that you'll only see one tiny part of the page- in this case, the bottom 1/2" or so of this piece. So even if something has words on it, it's not a big deal- you can use whatever part of the page you want. I even ended up with one of my beads having the word "harmony" on it, which I loved!

I started off by putting glue on the right side of the opposite end of the page- that way it would stick as soon as I started rolling it around the pencil.

Once I had my "initial stick" then I held it in place while I glued the rest of the sheet (wrong side).

After that, I just rolled it up using my pencil.

And there's the finished bead, which I cut in half to make two separate beads.


Here's Starlet stringing a bracelet for herself. I tied the end of the string onto a pencil to prevent her beads from sliding off the end.


And here's Little Boo. She wanted to be with us so I set her up in her high chair with paper and a pencil and some crayons. She had a blast.


Here's Starlet modeling her finished creations!

And here is my chic, upcycled/recycled magazine paper bracelet!! It's kinda gorgeous, if I do say so myself.

I would explain how I did the parallel beading, but I kind of just made it up as I went along. I'm sure there are probably tutorials out there somewhere!

Here's a few tips if you decide you'd like to make your own magazine bracelet:
- We tried patterned scrapbook paper, but it was a little too thick- the beads kept wanting to unroll.
- Use caution when cutting a larger bead into smaller pieces. They have a tendency to go flying across the room.

- Make all your beads before you start stringing them. I got excited and started stringing right away, before I had enough beads. I made more, but they were different colors than the first beads (because they came from different pages) so half of my bracelet looked kind of different from the other half. I think it's better to have the colors completely integrated for a cohesive look.

- Don't plan on wearing this if there's a possibility you may sweat (or have your hand/arm come in contact with moisture- like washing dishes, etc.). I had mine on tonight while I was out, and I had my coat on inside a place and I got a little warm- barely noticeable, but I started getting some very strange markings on my hand from my bracelet... I'm thinking if I do more of these I might look for some kind of clear coat paper sealant. :-)

This was a super fun project, and it's great for kids AND moms! And of course, my favorite part was that it was FREE!! I'm thinking I might make another one or two of these just for fun!

Have you ever made a magazine bracelet? If not, think you'll give it a try?

For another fun post on ways to use old magazines, check out My Secret Room.

This week I'm linking up to....


Transformation Thursday


125button
Related Posts Plugin for WordPress, Blogger...